How to enable Alien FX on the new R12


In case you missed it, we recently added the Aurora R12 to the Alienware lineup and we're so excited to bring you the latest Intel CPUs to our much-loved Aurora.
For new Aurora owners, or for those who might be upgrading from a previous version, you might notice a new feature we implemented for this generation. Upon powering up your new R12 for the first time, you might notice that the LED lights, with the exception of the Alienware power button, are powered off by default. We've implemented this change as an effort to help conserve power and energy by default. The LED zone lights are not faulty, and can be easily turned on. In fact, owners should notice upon setting up the system for the first time, a system tray notification will allow you to turn these zone lights back on.
However, in case you miss or accidentally dismiss the notification, or in case you forgot where your lighting settings are on any Alienware connected devices, here's a quick guide to enable your Alien FX from Command Center.
Step 1: Launch Alienware Command Center from the Windows Start Menu.

Step 2: Wait until AWCC completes the service initialization and guides you to the Home screen.

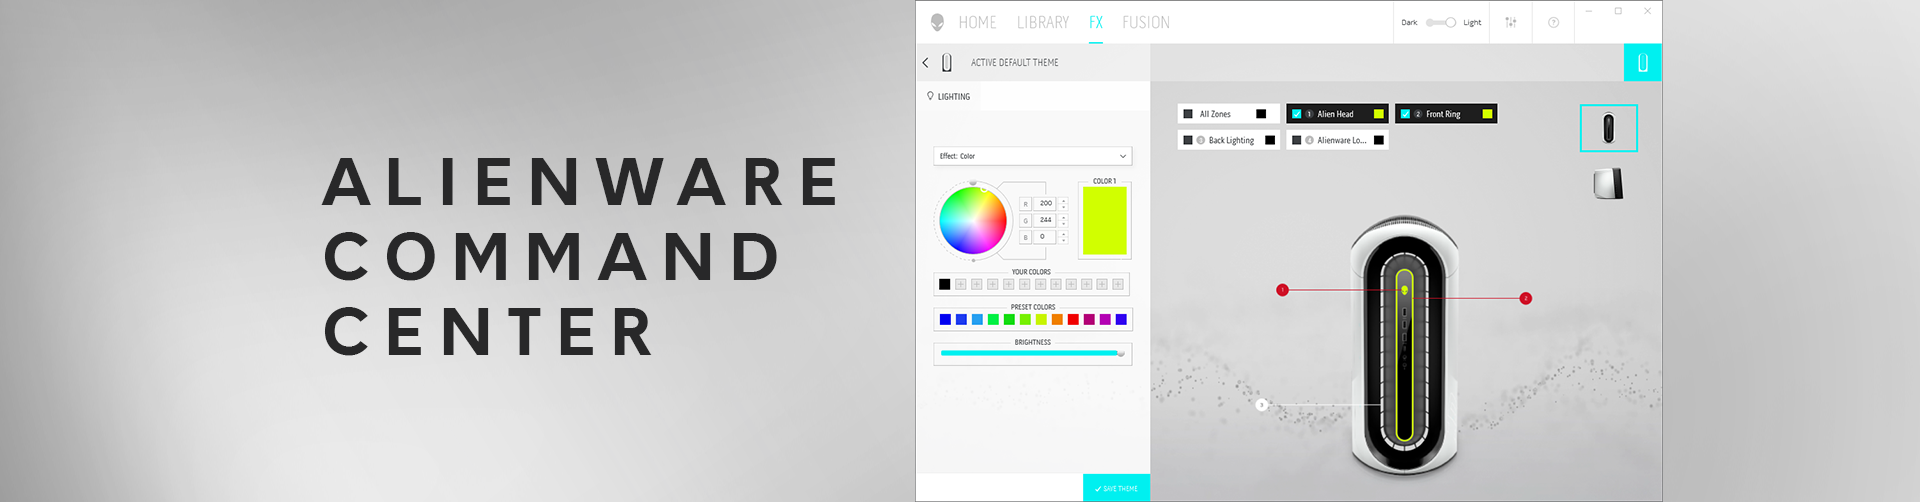
Step 3: Tap FX on the top menu to enter Theme section. Here you will see the LED control section.

Step 4: Click the Edit button

Step 5: After clicking the Edit button, you will see LED Zone/Color setting interface. Click to select the zones you want to adjust the color or brightness. This feature also supports single or multi-zone selection.

Step 6: After configuring your LED setting, click the “Save Theme” to apply and store your changes.

And that's it! Six easy steps to personalize your system and give your Aurora the full Alien FX treatment. To learn more about Command Center, and add other Alienware devices, check out our Quick Guide.
What color RGB lighting is your favorite on your Aurora? Let me know and sound off in the comments below.